|
|
|
|
|
|
|
When I think of "comfort food," many things come to mind, including hamburger and fries, bacon and eggs, biscuits and gravy, menudo and tamales. In Mexico, tamales are the "ultimate comfort food," as they're not only universally loved, but they're a great excuse to throw a family get-together, known as a "tamale party." In California, you can purchase tamales everywhere, but there is nothing I love more than to make tamales at home, completely from "scratch" and by hand, just the way I remember from a visit to Tamales de Margarita, near Ensenada, or the enjoyable times I spent at Meling Ranch, a working cattle ranch, located in Baja California, Mexico. Please note this isn't a recipe, or a step-by-step tutorial on how to make tamales. There are many recipes and tutorials available on the web... This is simply a pictorial of the way I make chicken tamales, with salsa verde...
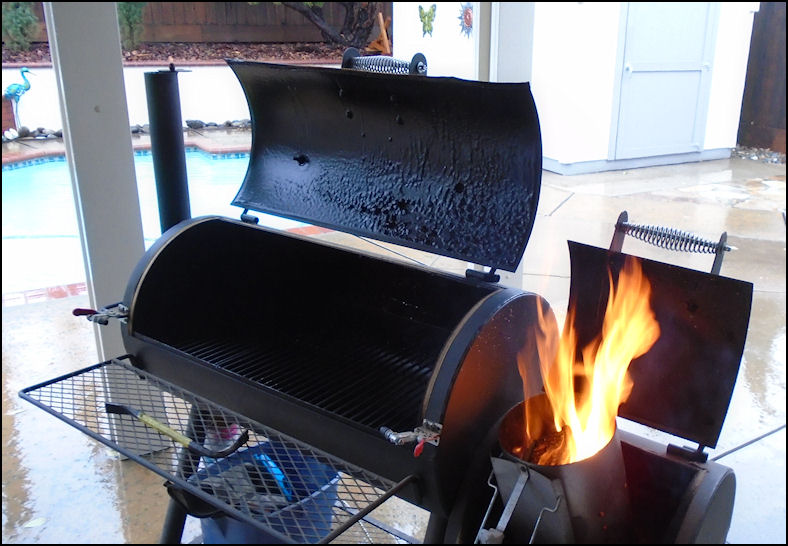
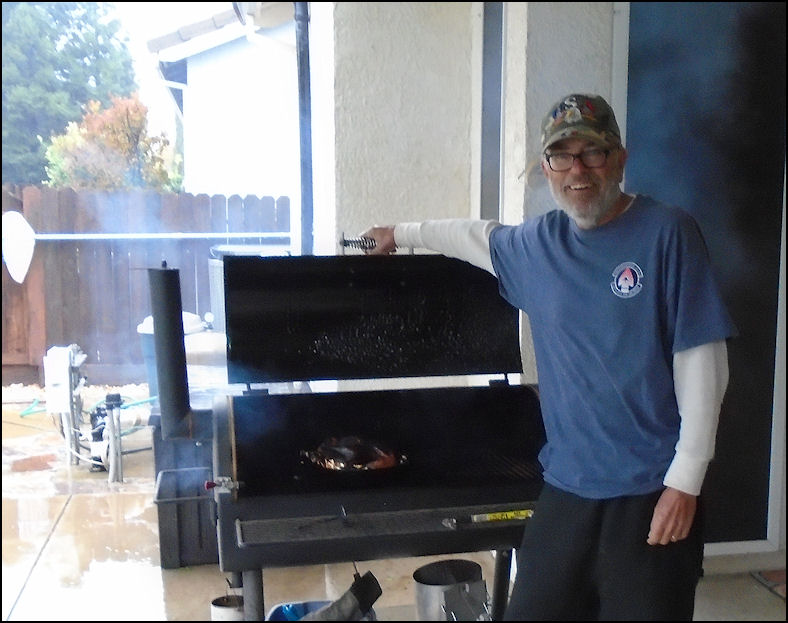
Photo: The tamale making began mid Sunday morning, October 24, 2021, when I started oak wood in the chimney starter, to get the fire going in the smoker. I prefer to do everything by hand, as "low tech" as possible, and today's plan was to smoke a whole chicken, using locally-gathered oak wood, which grows native in western Placer County. Oak wood is everywhere, just lying on the ground, so all you have to do is to pick it up, take it home, get out your handy sawsall, and cut it to size. For smoking, I like to cut my wood into small logs, about 2" in diameter by about 6" long, but since it's wild oak, the dimensions widely vary. Oak is similar to hickory, and it makes for outstanding smoking! If you choose not to smoke your bird you can always boil it in a pot, as the way it's commonly done in Mexico, As the chicken boils in the pot, it makes it's own broth, so that will help you skip the stock-making step the next day.
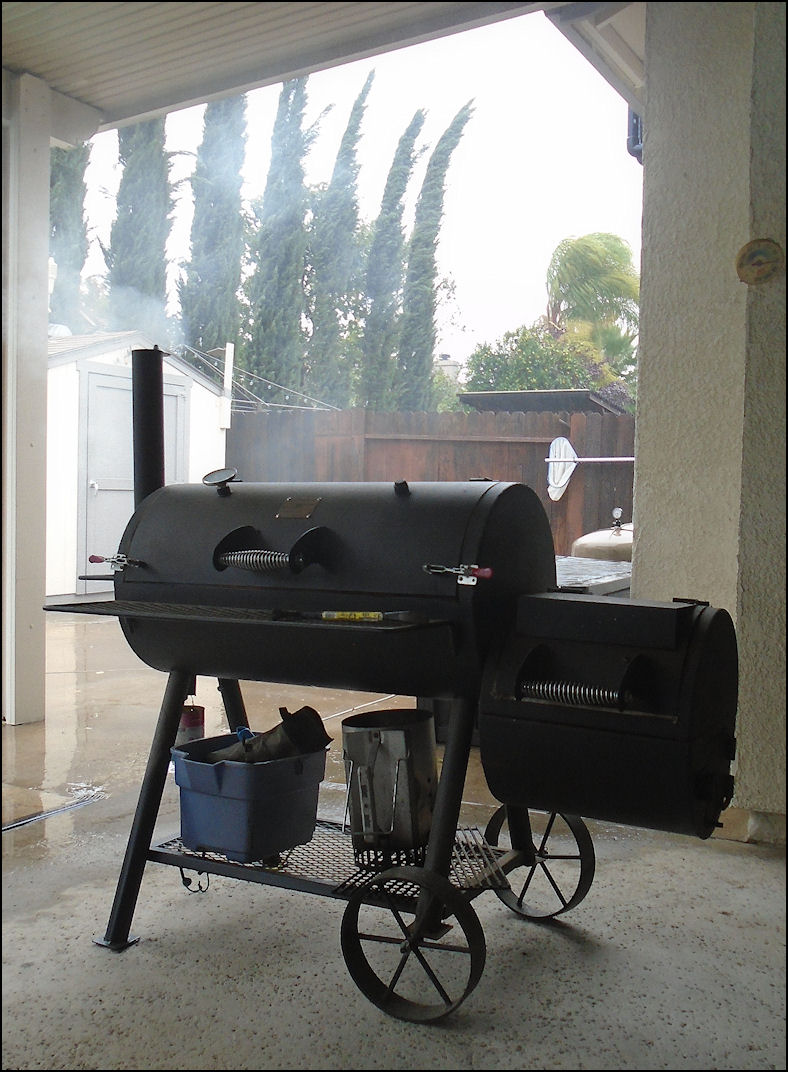
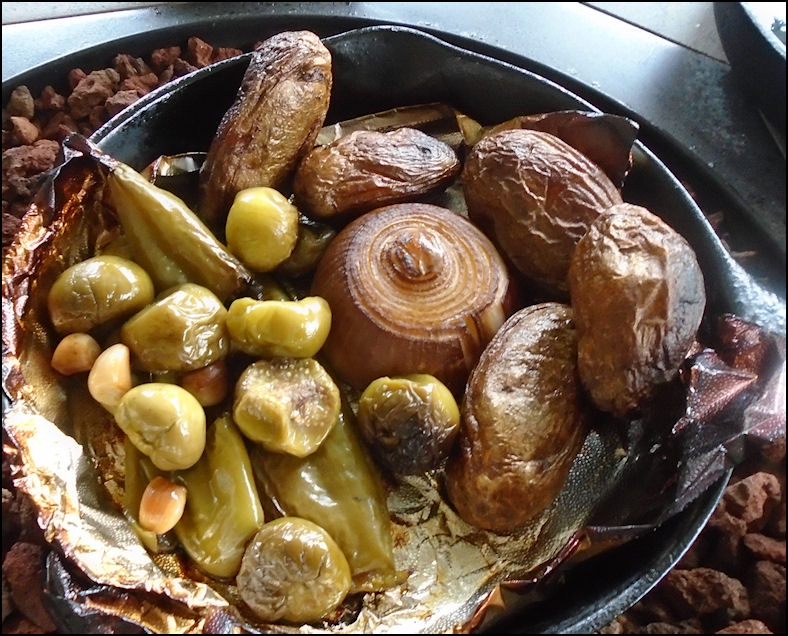
Photo: Weather wise, my choice of days wasn't the best, as on this Sunday in late October, we recorded about 6-1/2" of rain, which was the all-time record for Roseville rainfall in a 24-hour period, and what the weather guys called a "500 year storm." The patio cover kept my smoker dry, and the cheery oak fire in the firebox provided much-needed warmth on this stormy day. I smoked a whole, stuffed chicken for the tamales, along with tomatillos, onion, garlic and peppers for the green sauce, also known as salsa verde. Since the chicken was whole, I stuffed it with cornbread stuffing, which was not intended for the tamales, and threw a couple of potatoes in the pan to smoke and bake.
Photo: I smoked the tomatillos, chili peppers, garlic and onion for about three hours. to give them a taste of the smoke, but not to render them overtly mushy. I took out the potatoes at the same time. After allowing the veggies to cool, I threw them into the blender, along with salt, cumin and a few tablespoons of chicken broth to make the salsa verde. The salsa verde was stored in the refrigerator until Tuesday, when I assembled the tamales.
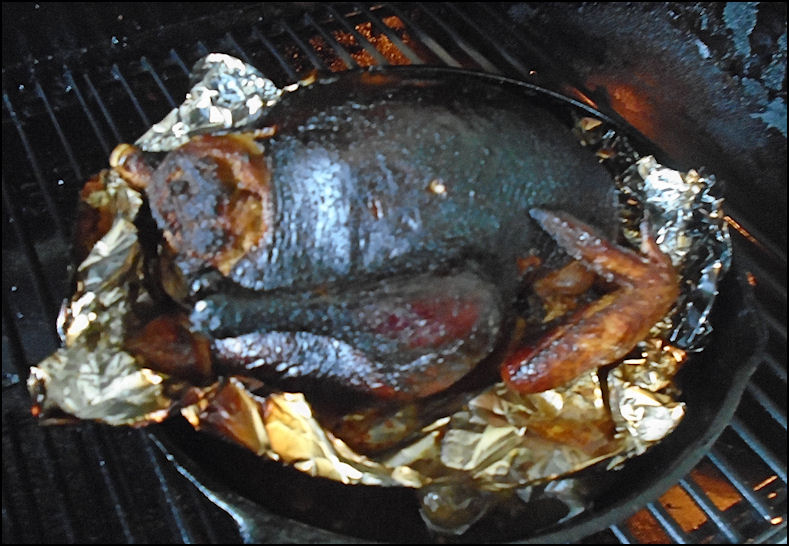
Photo: I wrapped the whole chicken in foil, elevated it in a cast iron skillet, and allowed it to cook at about 300 degrees, until the internal temperature reached 180 degrees in the breast, as per the guidelines for cooking poultry. The chicken was cooked indirectly by hot smoke, which gave the meat a delicious, smoky taste, which complimented the meat, and enhanced, but didn't overpower the delicate taste of chicken. I put a pan of water where the smoke from the fired entered the cooking chamber, so as not to dry out the meat. My smoked chicken was as tender and moist as it gets!
Photo: Just before removing the chicken from the pit, I opened the lid to display my masterpiece.
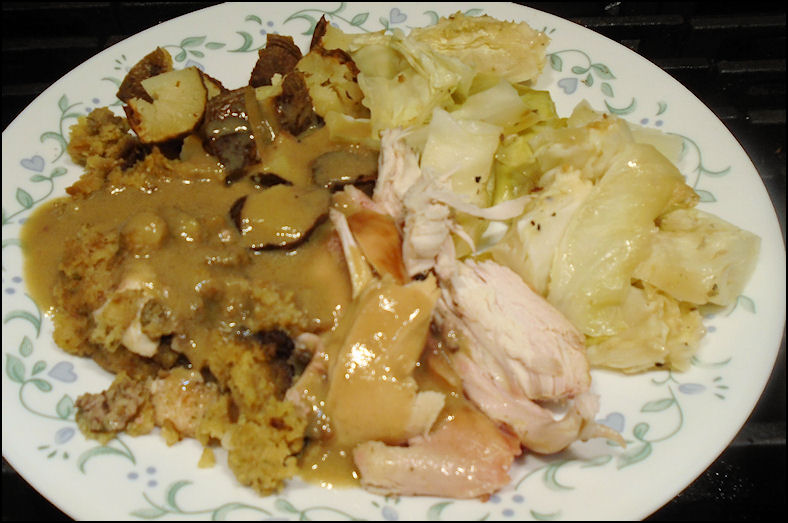
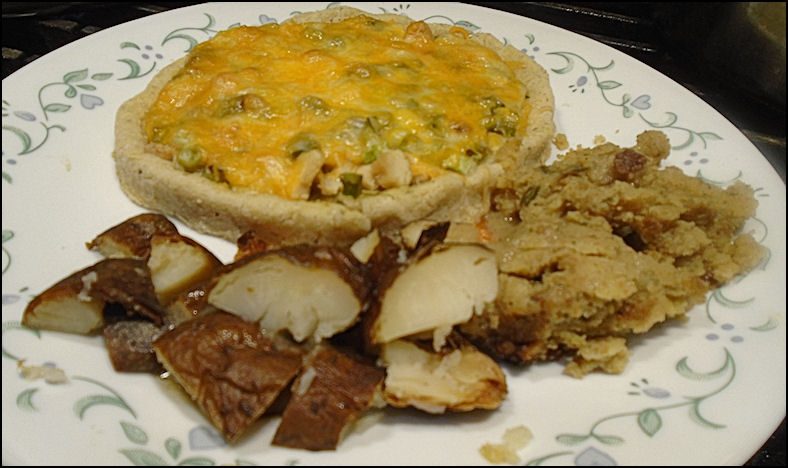
Photo: After allowing the whole chicken to cool and rest for about an hour, it was time to carve it. Today, no knives were needed, as the meat simply fell off the bone as I picked apart with my hands, as it was so moist and tender! I separated the meat from the skin and bones, and reserved the meat for the tamales, and placed the skin and bones into a bag, as they would be used to make chicken stock tomorrow. Tonight's dinner was a small portion of the chicken I smoked today, one of the potatoes, along with a helping or the cornbread stuffing. The cabbage was left over from a couple of days ago, and made a great vegetable side dish. As mentioned before, I elevated the chicken in the cast iron frying pan so it wouldn't stew in the juice during smoking. From the pan juice, I added a little butter and masa harina and made chicken gravy for tonight's dinner.
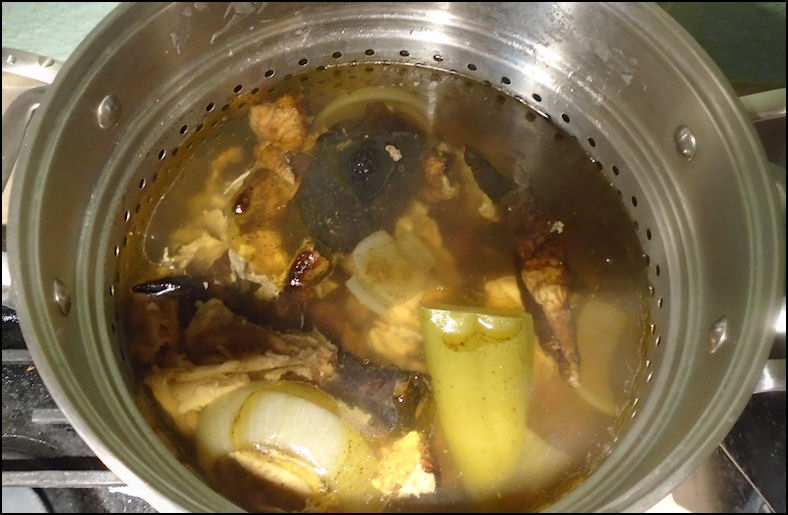
Photo: At about 7 in the morning, Monday, October 25, 2021, I got the stock pot going, to make broth for the masa, and future meals that call for chicken stock. In a large stock pot, I added a couple gallons of water, along with the skin, bones, neck and other leftovers from the chicken. For additional flavor, I added a half white onion, a couple of Anaheim chili peppers, with a few sticks of celery. I brought the stock to a rolling boil for about 10 minutes, turned the burner down to low, covered the pot, and let it simmer on the back burner of the range until late afternoon. When it came time to remove the skin, bones and veggies from the broth, it was easy, as the pot we have has a strainer insert, so when you lift it out, everything comes out easily, leaving only the broth. I let the broth cool for a couple hours before packaging it away for future uses. I left out six cups of broth to use for the masa dough.
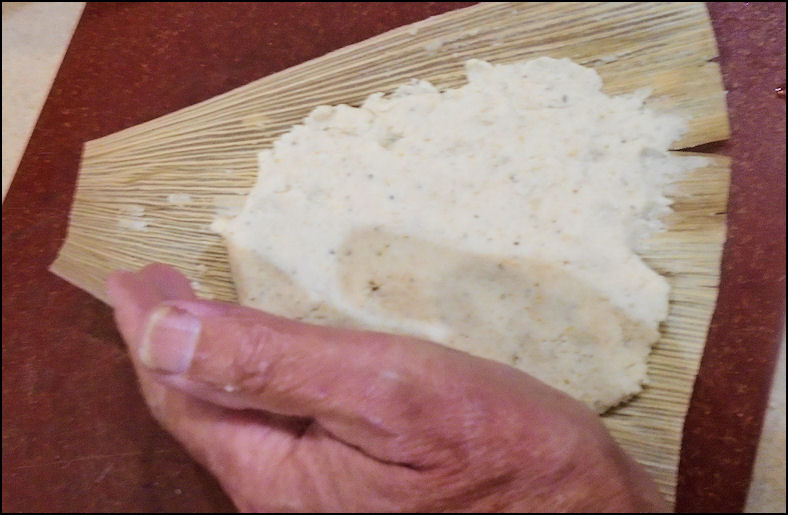
Photo: Tuesday afternoon, it was time to assemble the tamales. The first thing I did was got out my corn husks, counted out 40 of them - I planned to make three dozen tamales - and wash them, as they always have small stones and debris in the package, which aren't desirable with tamales. After the husks were clean, I submerged them in warm water in the stock pot, to soften them up. Meanwhile, it was time to make the masa dough. I used 8 cups of Maseca brand masa harina, salt, baking powder, a couple cups of melted lard - yes... LARD... and six cups of the chicken broth I made yesterday. I got out the largest mixing bowl in the kitchen, poured in the dry ingredients, and mixed them thoroughly together by hand. Then, I added the lard and mixed it all together for a couple of minutes until the mixture resembled wet sand. I dumped in all six cups of chicken broth, and mixed it al together by hand, until all ingredients were thoroughly blended. The idea is to get the mixture to be about the consistency of hummas, so it will easily spread on the corn husks. At first my dough was a little of the stiff side, so I added another half cup of broth, mixed it for a couple more minutes, and I was rewarded with perfect dough for spreading on the ojas, better known as corn husks. I removed the now-soft corn husks from the water and dried them, leaving them damp, but not wet. I sorted them on to two plates, with one plate "big" husks, and the other one "small" husks. This step is just something that I do, as I've never heard of anybody else who does this. I like to take two "small" husks, place them together, and apply masa dough on them, which makes them stick together. By doing that, I make sure all tamales are about the same size, which makes for uniform steaming. The husks have a smooth side, and a rough side, and you ALWAYS want to apply the masa dough on the smooth side! I grabbed a "big" husk, placed on the cutting board, and scooped a helping of masa dough on it, and spread it around with the back of the spoon. Using my hands - tamale making is a "hands-on" project - I spread the dough around as shown, and flattened it to about an eighth of an inch thick. You leave the edges and the top bare, as you'll see when we get to folding the tamale.
Photo: Next, you apply a generous helping of the tamale filling down the middle of the tamale, leaving plenty of masa dough so you can seal the tamale when you roll it up. I like to mix the salsa verde with the chicken together before I place them on the tamale, but some tamale makers do it separately.
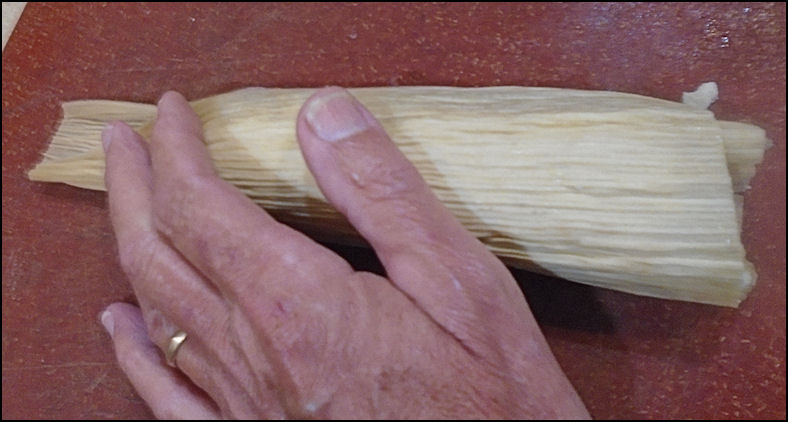
Photo: You then take and fold one side of the tamale over to the other side, by lifting the husk a little, and making sure the masa dough from both sides meet. Slightly pinch them together, and fold over a little the opposite direction, making sure the fold is covered by the husk. Slightly pinch shut the large open end, and the smaller end. Fold the small end over the tamale, and place the tamale on a pan with the fold down. In the photo, I'm lightly pinching the long end, and I'm about ready to fold it over. The process is easy, "low tech," and if you mess it up, just start over again.
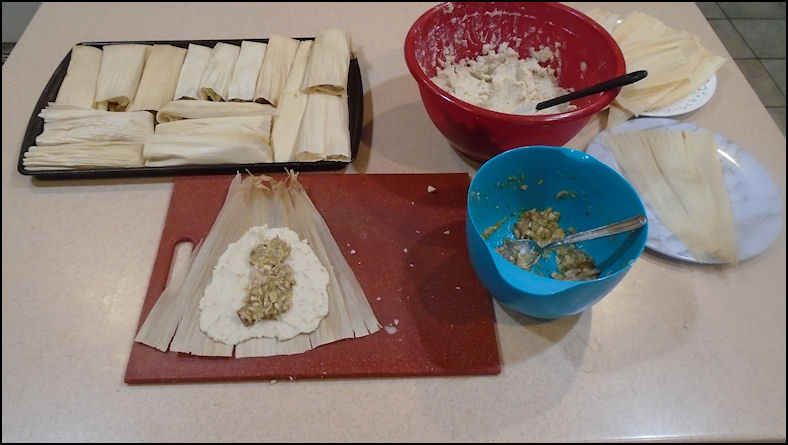
Photo: I've got my tamale making well underway on this Tuesday afternoon, and I've got the "goods" spread all over the island in the kitchen. Thank goodness I was "home alone" as I was definitely monopolizing the kitchen! I have a tamale that has been filled and is ready to be rolled. The filling, which is a mixture of shredded, smoked chicken and salsa verde is in the blue bowl, "big" husks are on the plate next to the blue bowl, and the "small" husks are on the other plate. Mixed masa dough is in the big, red bowl, which is the bowl that I used to mix it in, using my hands, the way it's done in Mexico. I've made about two dozen tamales so far, and they're on the cookie sheet. Next step will be to steam them in a big pot. I actually had leftover tamale masa, as I ran out of filling. No worries if you have leftover masa dough, as there are many things you can do with it.
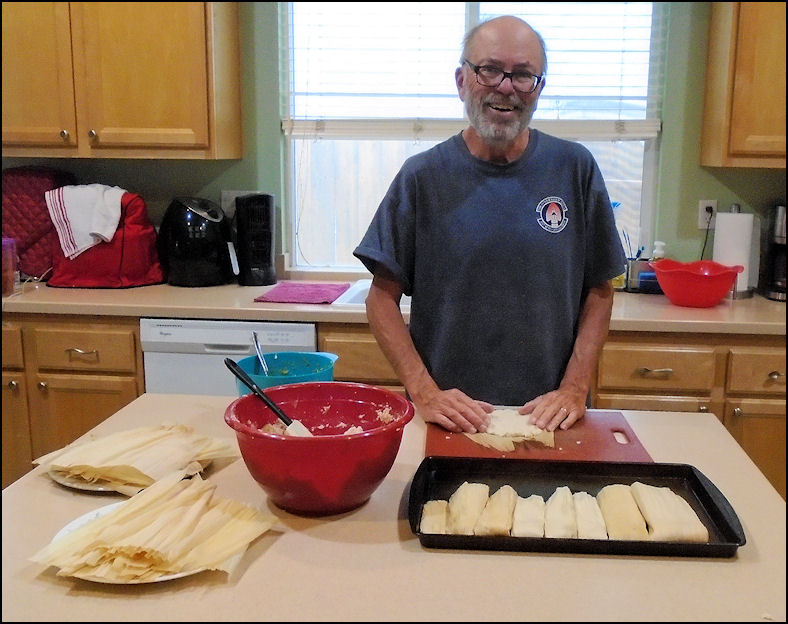
Photo: I'm a happy guy, as there's no better way to spend a Tuesday afternoon than making tamales at home.
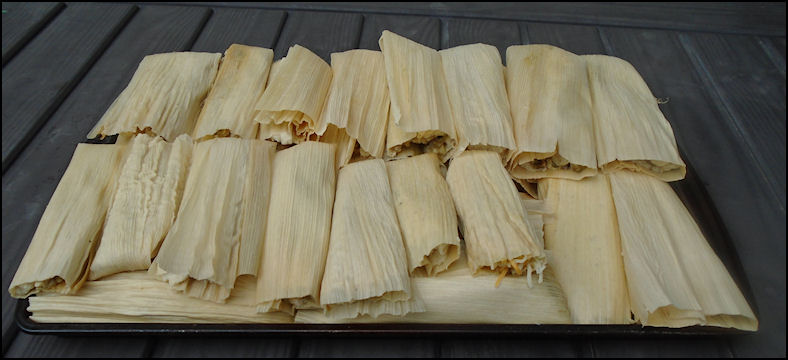
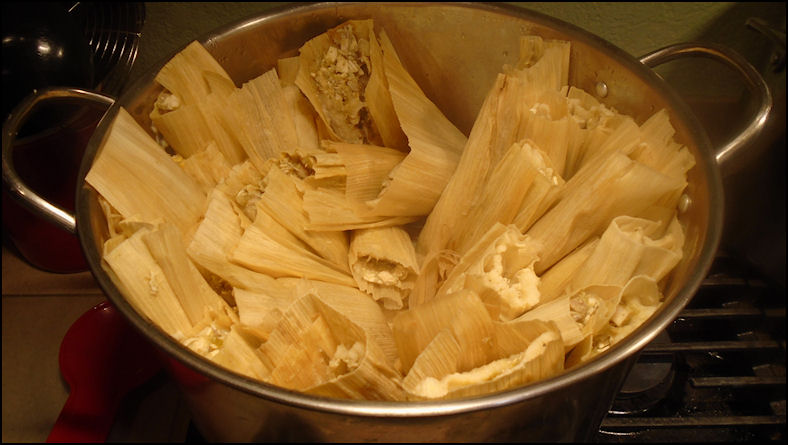
Photo: Three dozen chicken tamales, ready for the pot. To make things easy, after I folded them, I placed them on a cookie sheet, fold side down.
Photo: We have a large 20-quart stock pot, with a rack, to steam tamales. The rack allows about 4 inches of water in the pot, which is enough to steam as many tamales as the pot can hold, which is about three dozen. You DO NOT want the tamales to touch the water! The tamales can be packed in the pot pretty tight, but leave room for steam to circulate, as that what does the cooking. Bring the water to a hard boil, cover the pot, and enjoy. Steaming time varies, but today I steamed my tamales for about 90 minutes, which seemed about right. When I thought they were done, I removed a small tamale, unwrapped it, and noted the tamale easily separated from the corn husk. Done! Of course I had to give the tamale the "taste test" and it passed. I took the pot off the burner, and allowed it to cool for a couple hours before I put packaged most of the tamales for the freezer. Naturally, I left a few out to enjoy! I started assembling the tamales around noon, and by the time the last tamale was put away in the freezer, it was nearly 8 in the evening, which made for a long, enjoyable day.
Photo: What do you do when you have a little bit of masa dough left over, and you're out of husks? I rolled the leftover dough into a ball, and then flattened it out to make a small pizza-like circle, about the size of a pancake. I added salsa verde - commercially made - shredded, smoked chicken, and topped it with Mexican cheese. I baked it in the toaster oven at 350 for a half hour, and it came out great! For dinner, I used a baked potato and stuffing from yesterday, along with a couple spoons of gravy.
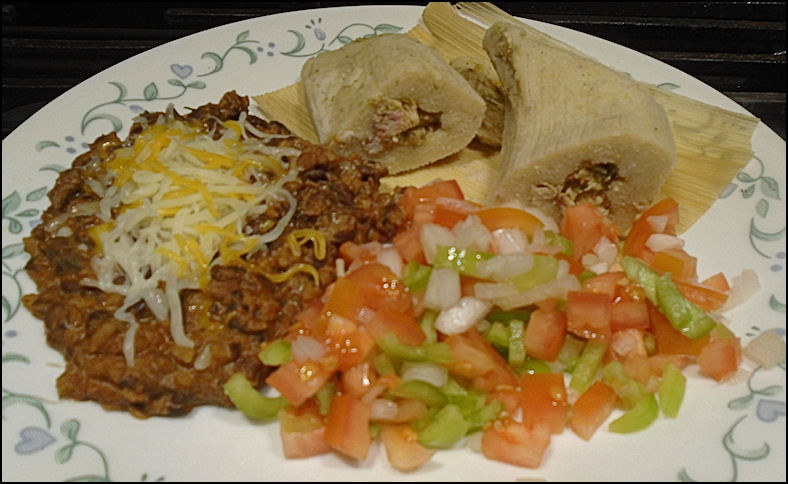
Photo: Wednesday, October 27, 2021, it was time to enjoy my first "official" tamale dinner. I had some time on my hands, so I made a pot of refried beans, along with a helping of fresh "salsa cruda." This all worked out to make a great dinner. I'll be enjoying tamales for the next several month, as a have a stash of 30 or so in the freezer, waiting for future enjoyment. There is nothing so comforting than enjoying tamales that you made from scratch, at home! This is "comfort food" at it's finest! In addition to thanking the good folks at Meling Ranch, and others, I must REALLY thank a former girlfriend of mine, Sandy Lozano Johnston, and her amazing mom, who took me under her wing, and showed me the basics of authentic Mexican cooking, including the art of tamale making. As a 19-year old, I was eager and ready to learn her skills, and Mrs. Lozano was an amazing teacher! Thanks to this fine lady, 50 years later, I use all of the skills she taught me. Making tamales at home is very labor-intensive, but it's as "low tech" as it gets, lots of fun, and the end result is lots of tamales to enjoy! If you can't eat them all on the day you make them, no problem, as tamales freeze well, and after being thawed, they're as good as the day you made them. Muy sabroso! Copyright(c) 2021 eRench Productions. All rights reserved. We've been on the web since December 22, 2002.
|